This article used to be called "How to install PHP 7 on a cPanel/WHM driven server without breaking everything". It was initially written in 2015 when there was no way to run PHP 7 on a WHM server so the article was a tutorial on how to compile PHP 7 and "hack" the WHM configuration to make it work properly.
However, since nowadays we have EasyApache 4 with multi PHP support, I have updated the tutorial and turned it into the go to place for installing and configuring PHP on a cPanel server.
Once you have your desired PHP version installed you should switch to PHP-FPM.
Setting it up is very easy in recent versions of WHM - All you need to do is navigate to MultiPHP Manager, select the default system-wide PHP version and then hit Convert All Accounts to PHP-FPM.
With PHP-FPM enabled, in case you want to change global configuration variables, log in via ssh and put your configuration settings in this file: vim /var/cpanel/ApachePHPFPM/system_pool_defaults.yaml. After changing the .yaml fill you will need to rebuild the configuration by running /usr/local/cpanel/scripts/php_fpm_config --rebuild.
Below there's an example configuration file but the full list of variables and possible directives is here.
    _is_present: 1
    pm: 'static'
    pm_max_children: 30
    pm_max_requests: 1000
    pm_process_idle_timeout: 10
    # default php configuration value:
    php_admin_value_disable_functions: exec
    # custom php configuration value:
    php_admin_value_upload_max_filesize: { name: 'php_admin_value[upload_max_filesize]', value: 64M }
Easy Apache 4 also allows per-domain configuration for PHP-FPM. To make sure settings for one domain will be persistent and will not affect other domains running on the same server you'll need to edit the domain specific configuration file: /var/cpanel/userdata/[username]/[domain].[tld].php-fpm.yaml. Once modified, to rebuild the FPM configuration for only one domain just run: /scripts/php_fpm_config --rebuild --domain=[domain].[tld]
If you run a server with lots of accounts the default fpm setting in WHM (pm: ondemand) is the best for you. The reason why this is better is because the system will start processes as they are needed so on a "crowded" shared hosting environment it is better to not use up precious memory for websites/pools that receive very few visitors.
If you run a single high traffic website, you should enable pm: static and set the pm_max_children as high as it can go without overwhelming the server. When pm is static the pm_max_children directive basically says how many concurrent requests your server can handle at one time.
If you run a server with multiple accounts, but some are more "important" than others, you should set pm: dynamic and find a balance between the minimum/maximum spare servers you keep idle in the background for the "important" account and the resources/memory you leave "available" for the other domains hosted on the server.
Be very careful when setting up these values because you can easily end up shooting yourself in the foot :).
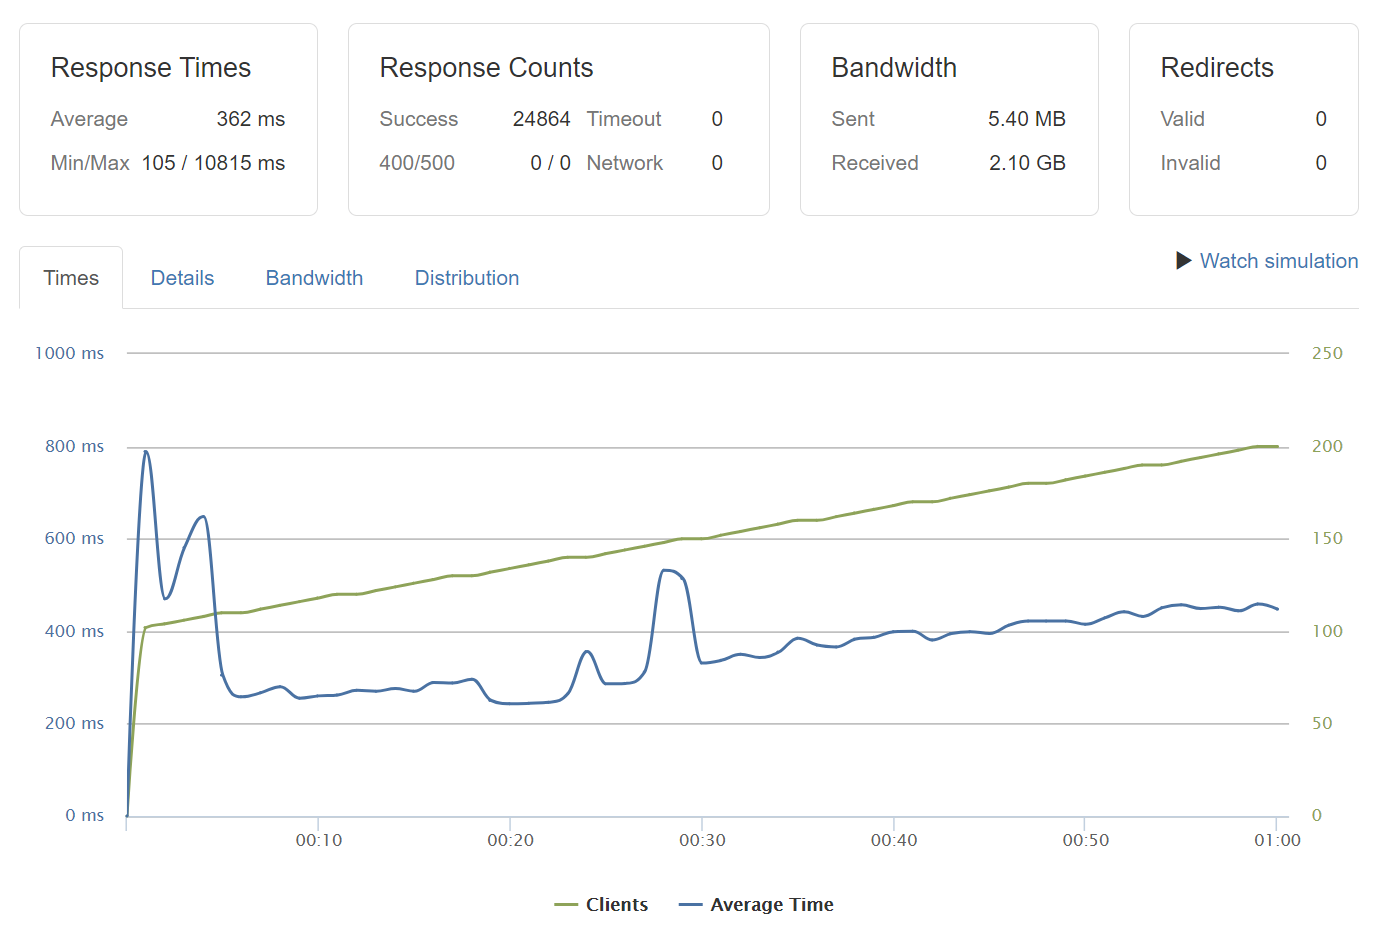
Before writing this article I took the time to experiment on my own server, a cheap VM with 4GB of RAM and 4vCPUs + SSD. I went ahead and started fiddling with the settings for PHP and ran tests using loader.io. I chose a page with very few database interactions to make sure that MySql bottlenecks don't ruin my tests, but unfortunately I had no way of eliminating Apache from the equation.
Below is the best possible result I got. It was only slightly (5%) faster when compared to the default settings with pm: ondemand. This leads me to believe that other settings are much more important when preparing your server for high traffic.